Showing posts with label Artstudio. Show all posts

Sunday, January 31, 2016

Do You Have A Favorite Process In Creating Your Art?

     When you create a piece of art, do you have a favorite step or process? I'm not sure I do. I'm slow to start a piece. I think about how I want it to look in the end and usually try to sketch it out and paint it several times first. I enjoy drawing and painting so I find that part fun and relaxing. Getting fabrics ready is also a good time for me because I get to mix colors with my paints and who can't have fun with that? If you get the wrong color, just keep mixing. If the fabric doesn't come out right for this project, it will be good for another one.
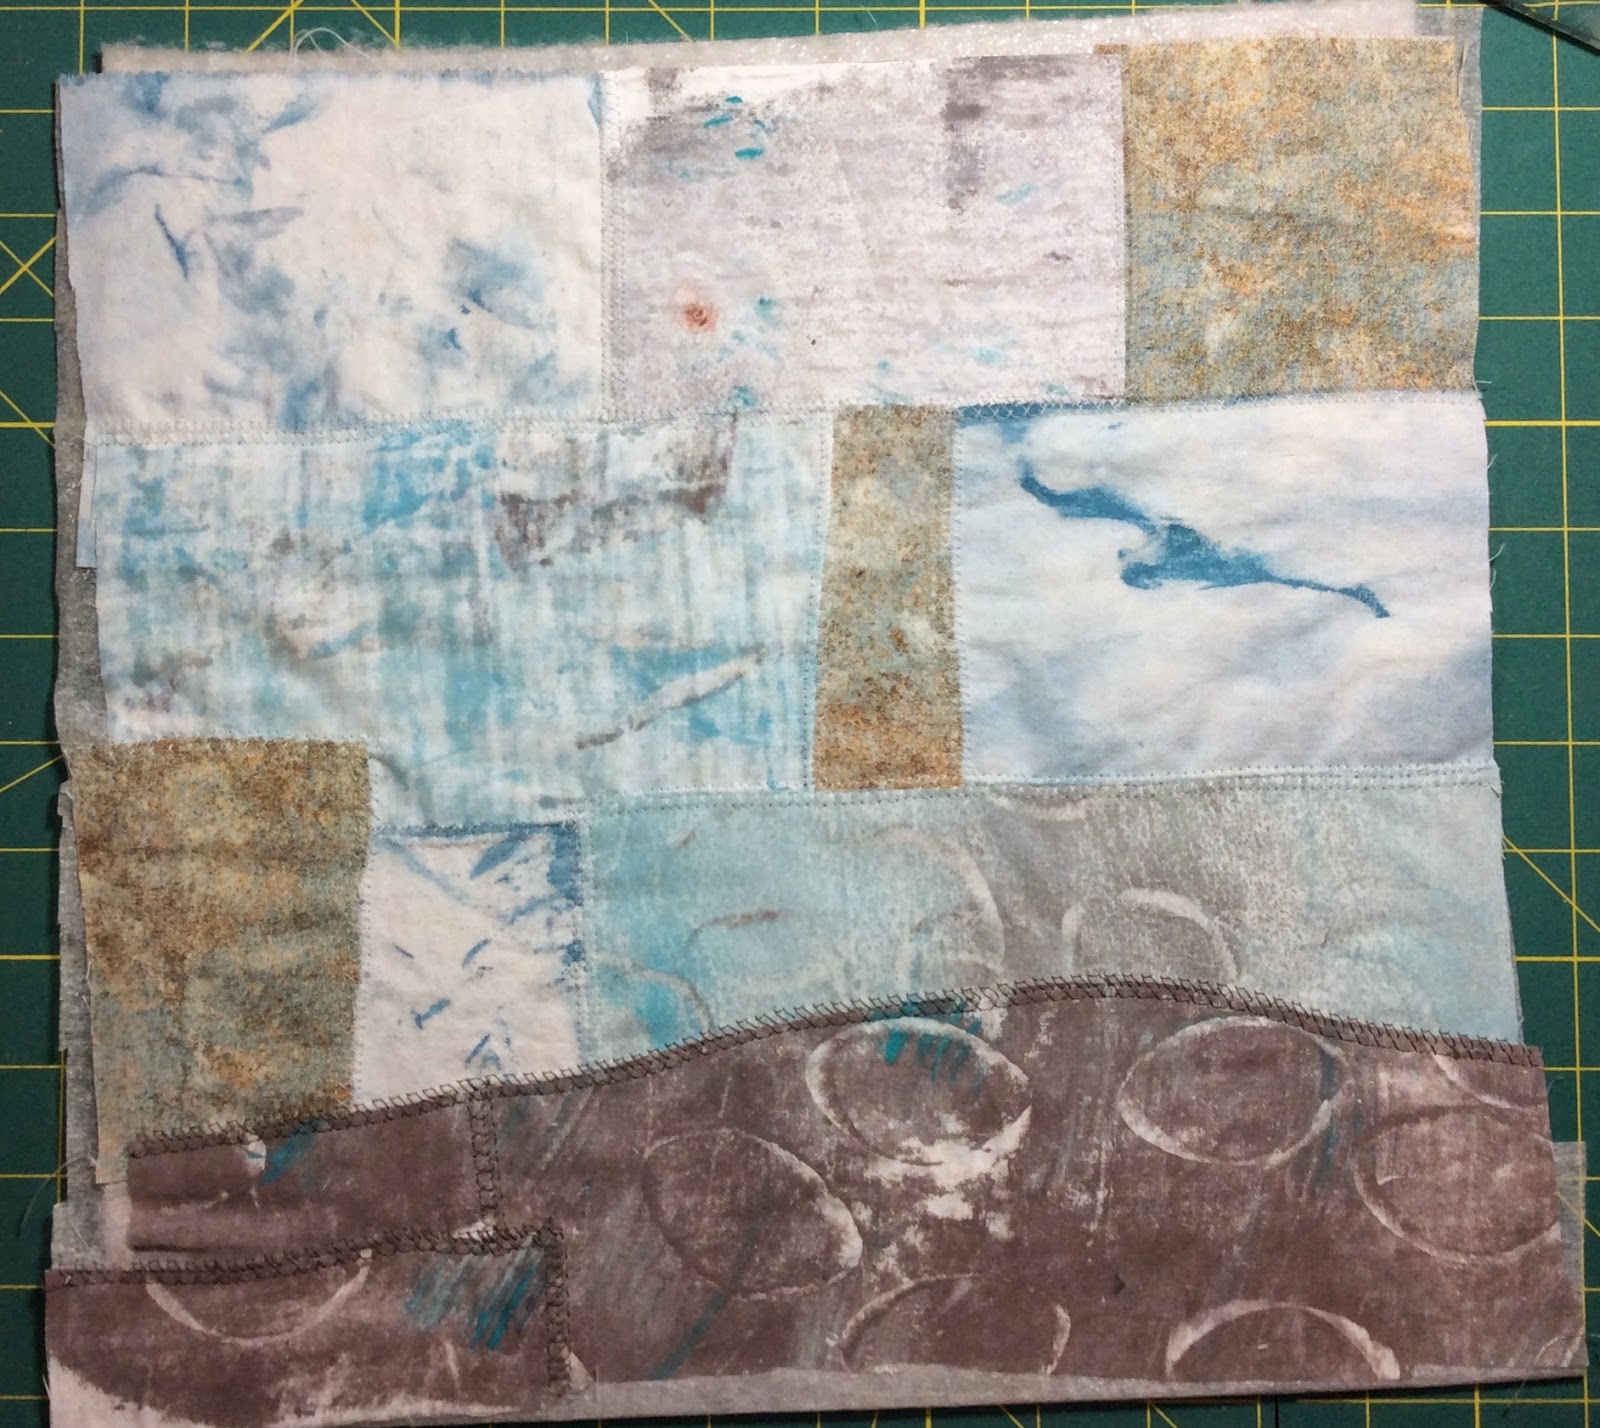
     In my last installment, I had my fabrics pinned on my design wall and was happy with the arrangement and colors, but it was a bit boring.
last week
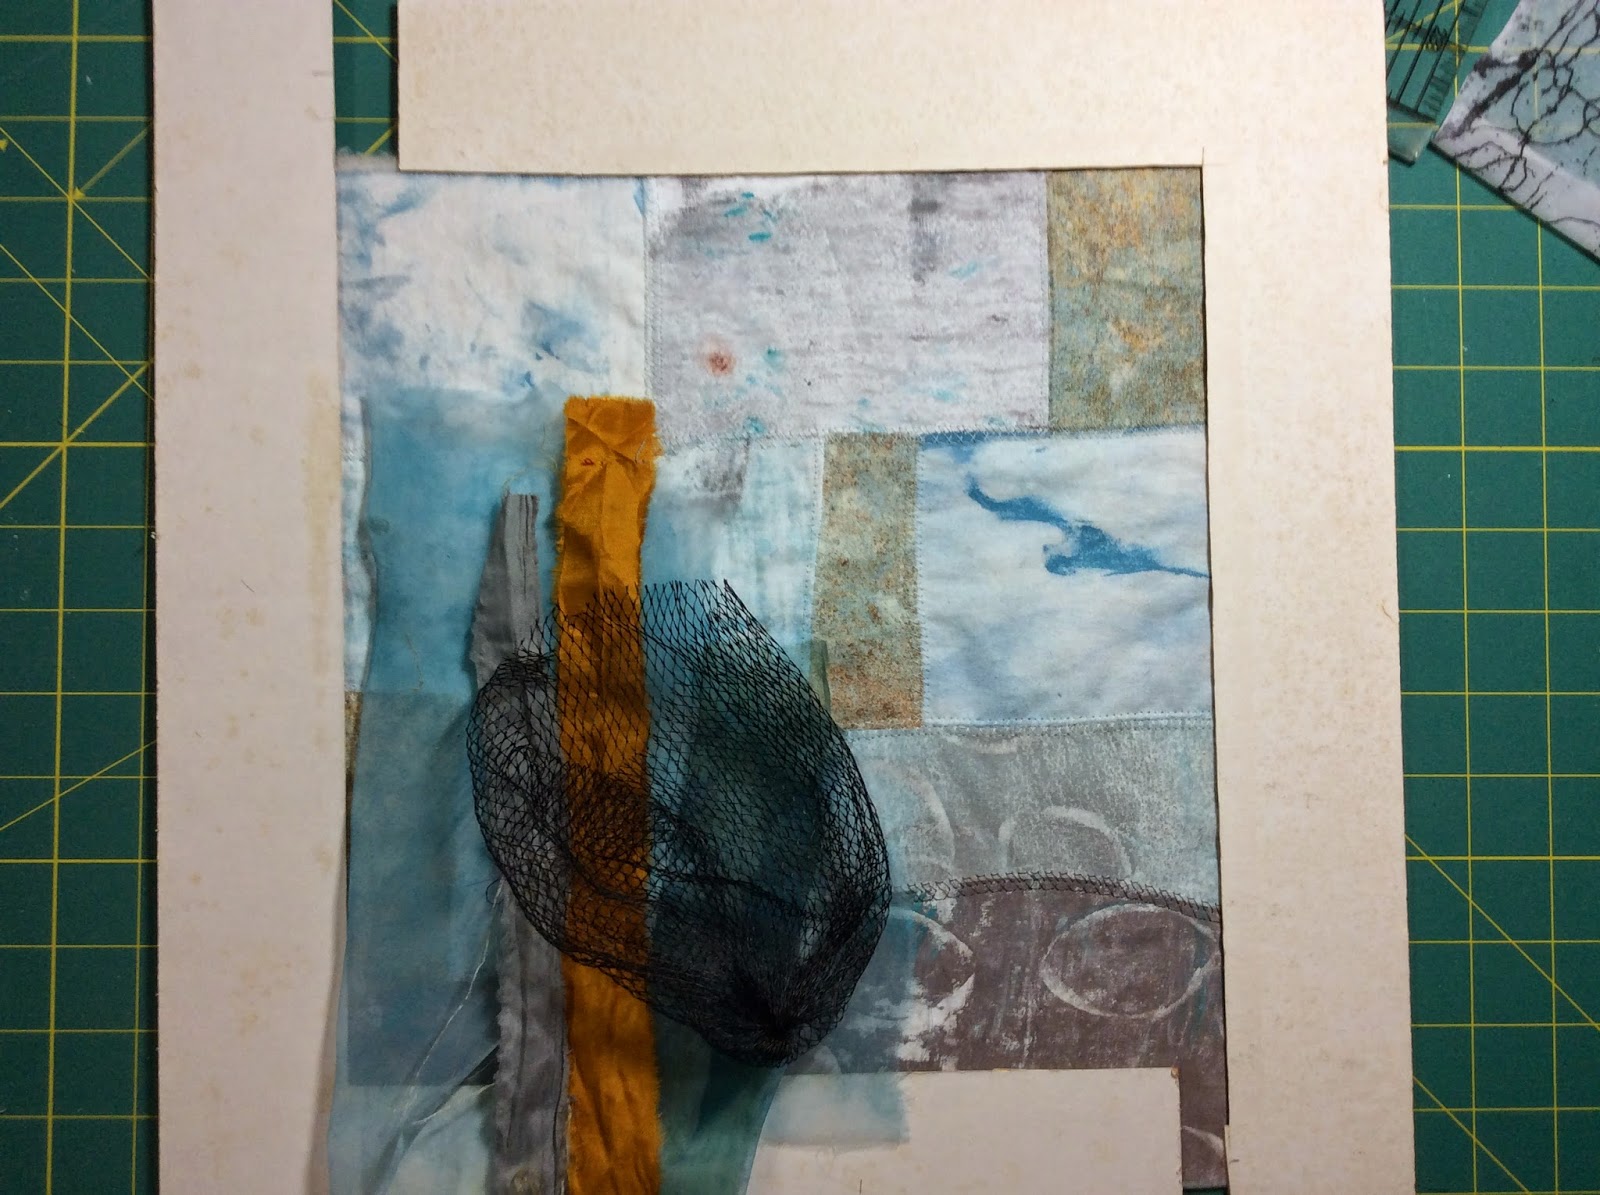
     The large rectangle in rust needed to be darker and more oomph. There was paint left behind in many of the colors on the plastic on the cutting table. So I sprayed it with water, put the rectangle of fabric on top of the leftover paint, and brayered heavily to pick up the paint.

adding paint from the plastic to the fabric
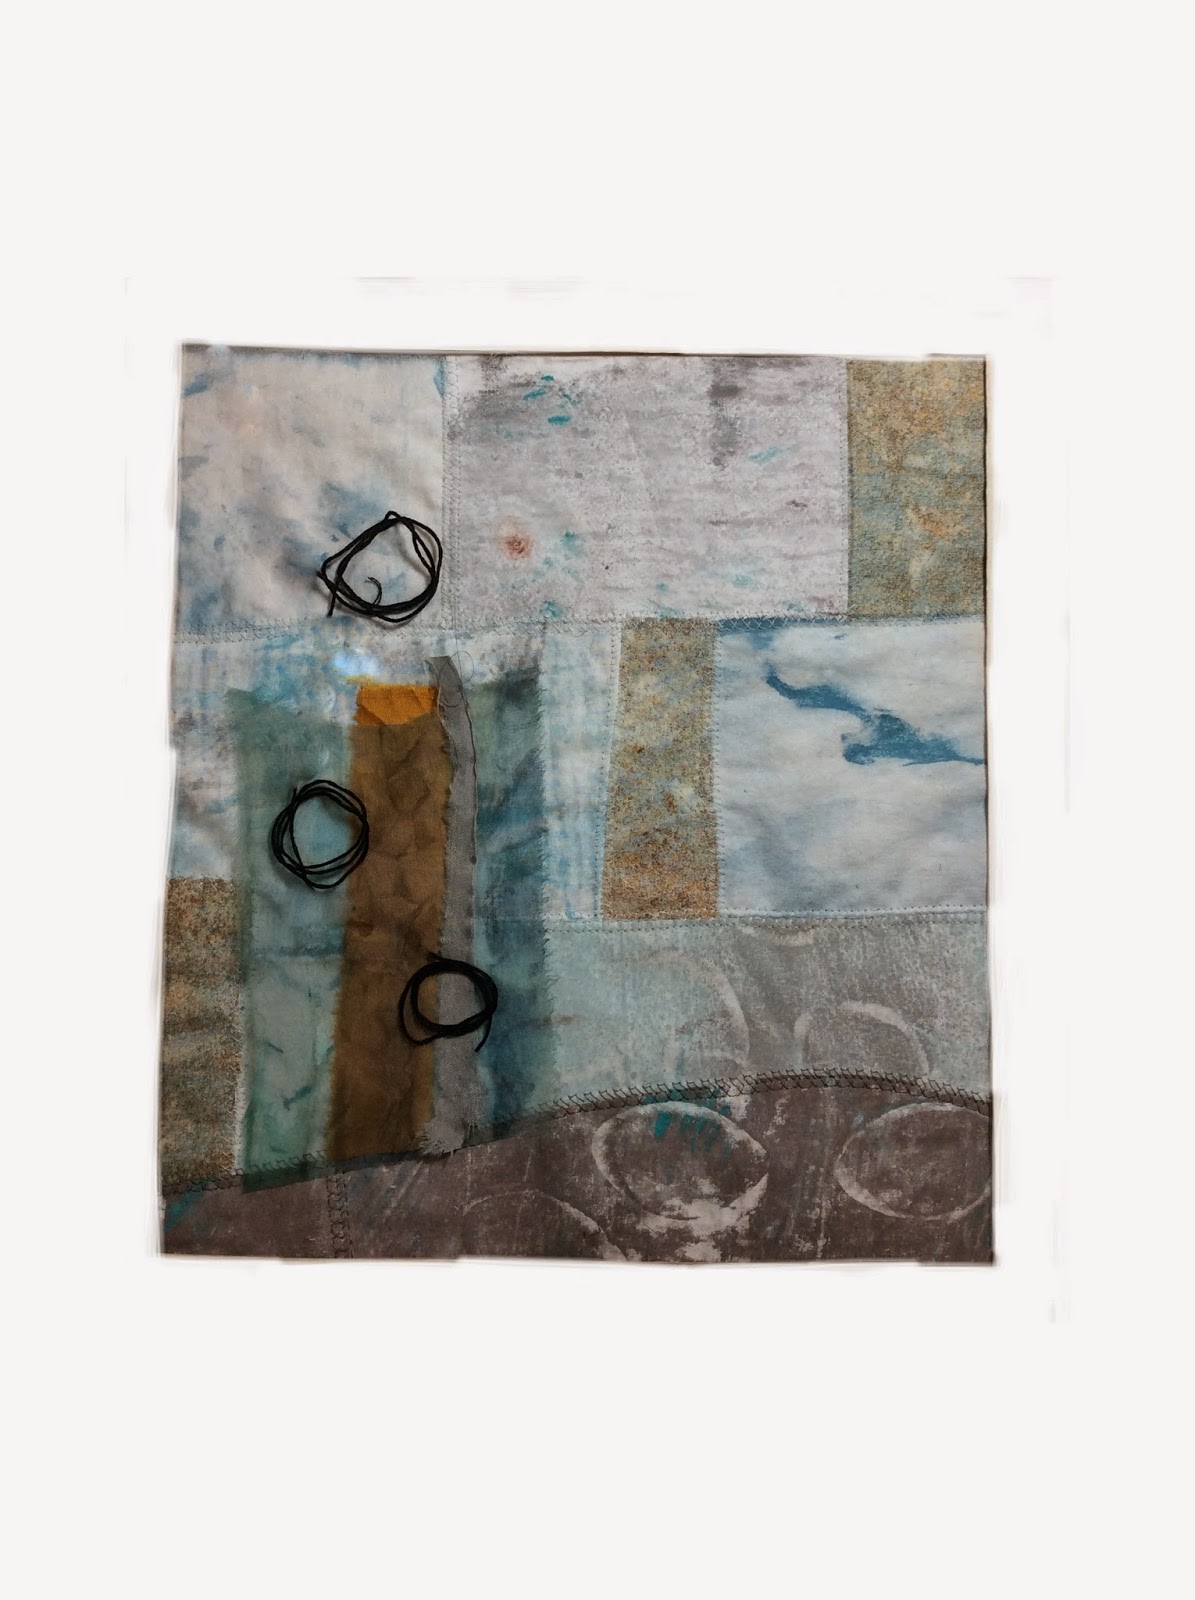
     That actually helped some and it cleaned up the mess. Then I added more paint using a sponge and Dyne-na-Flow in Chartreuse by Jacquard, and various rust colors I mixed up with acrylic paints and GAC-900 by Golden. Here is the result
surface designed fabric
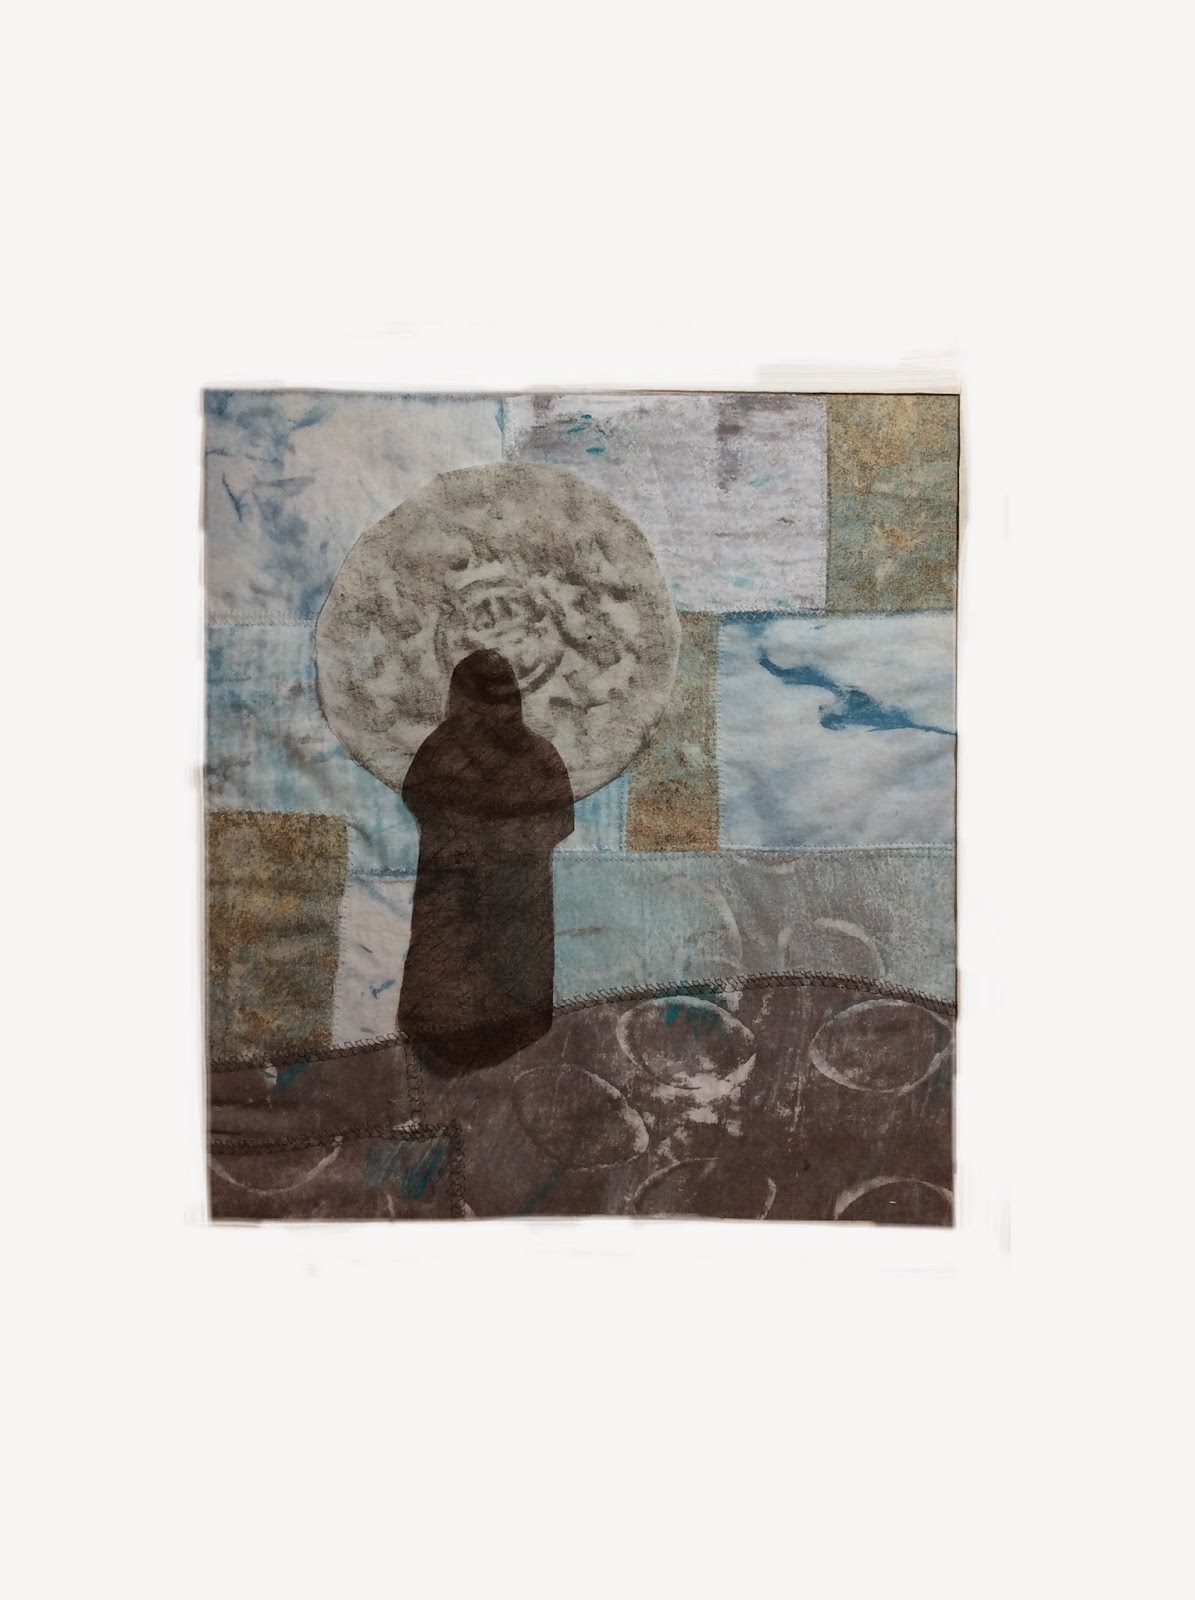
The fabric to the right of it is a commercial fabric by Stonehenge. I also added acrylic paints and GAC-900 to the girl and the window in places to darken that area, too. Once I was happy with the tints, shades, and hues, I sewed the fabrics down to the background fabric with a straight stitch. Then I backed it with batting and quilted the girl, window, and walkway. After that, I decided to add two more fabrics and pinned them on to try them out. I think I like them because they keep the viewer's eye from leaving the piece. I'll sew them down down today.  All of these steps have been lots of fun for me, too. It's like having a conversation with the artwork. It almost tells me what it needs next. As you see, it has changed from the original sketch and painting. Once it has become fabric, it takes on a life of its own with its textures and unique character and begins to evolve. It's a fascinating process to me.
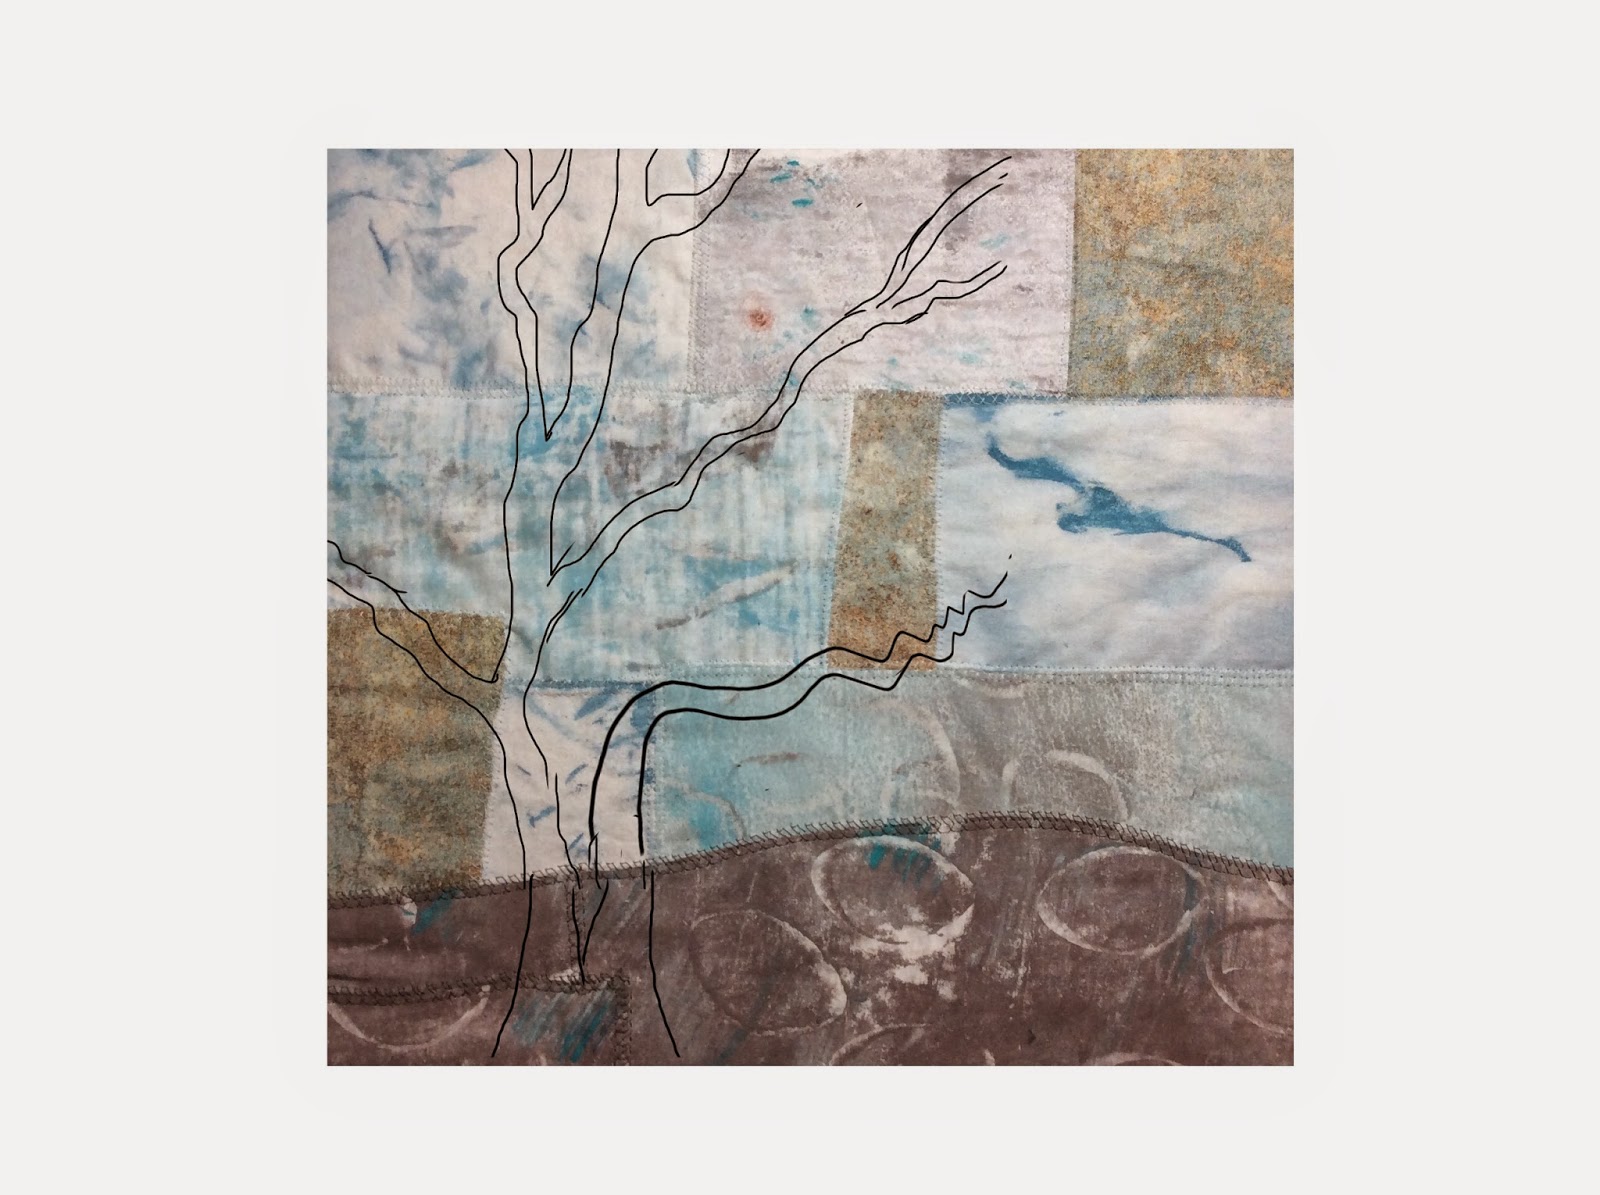
     I've been struggling with how to quilt the background. Perhaps, that is the least favorite part for me. I take the photos and put them into the App ArtStudio and then sketch possible quilt patterns on top to see what they might look like. For some of them, I'm happy with them for a day. Then the next day, I realize that they just won't look right for the piece. I think that yesterday, I finally hit one that will be just right for it (I hope). At least today, I still like it. 
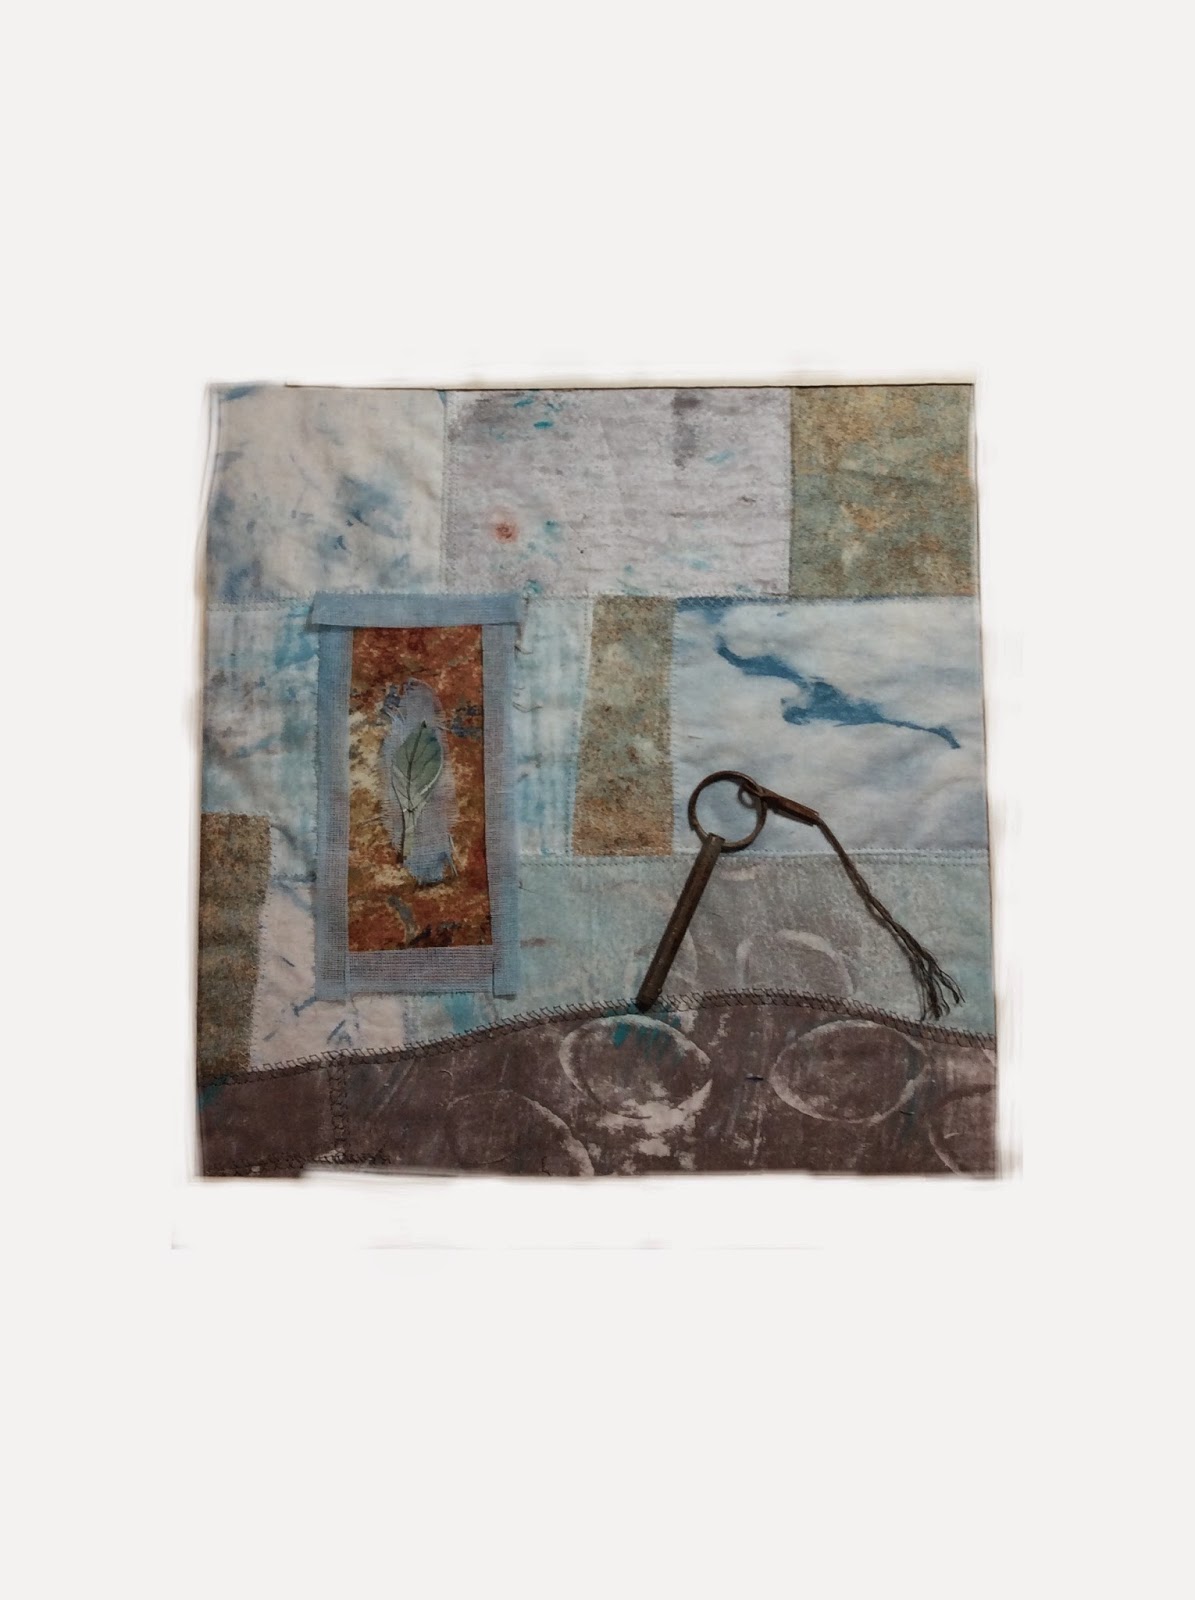
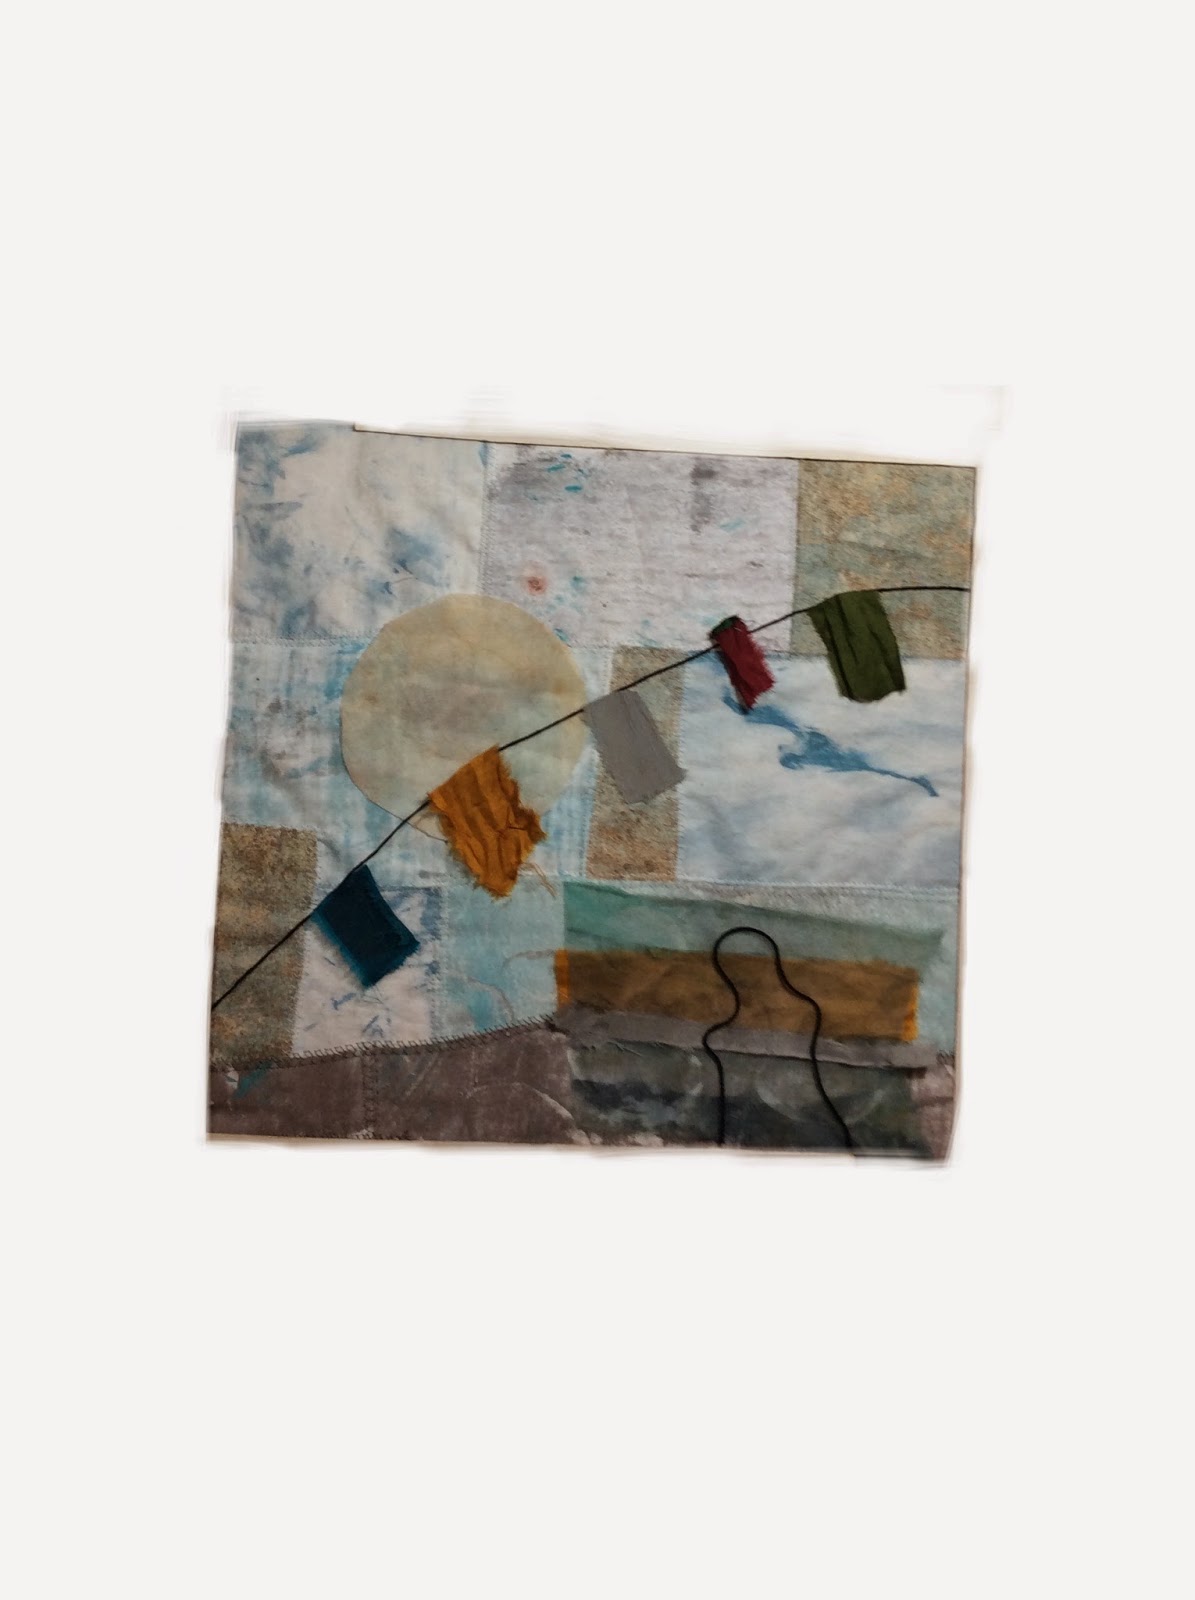
     So here is how it looks on the design wall now. (By the way, these photos are taken with my iPad at night with just the overhead light. That's why they are a little fuzzy.)
in process
     The next step for today is to sew the two new pieces of fabric onto the background. Then, quilt the flowers onto the bottom right (from the shadow photos I took here), then quilt the rest of the background, and finally put on a pillowcase backing. (I think that's the plan, anyway. Unless the artwork tells me differently as I go.) So, I guess my favorite process overall is the conversation with artwork. I'm linking this with Off The Wall Friday where you can find other art quilt blogs. Please make comments on their posts so that they know you stopped by. Thanks for visiting.

Thursday, September 25, 2014

How Do You Design Your Art Pieces?

     What method is an effective method to use to design an art piece? I've tried several approaches and haven't really settled on one hard and fast method.  I think I'll try a new one here. The other day I was watching TV and saw a commercial for eyeglasses. It was a store that sold inexpensive eyeglasses and they were trying to sell the idea that you should have several different styles to suit different moods. The woman opens a drawer and inside are several pairs of glasses. She puts on one pair and says something like, "I am an artiste." She puts on another pair and says something like, "I am a business woman, bring me my pie charts." And on it goes.
     So that gave me the idea to dress up an art background for different moods. I would take photos of each design and see which I liked the best, if any. At least it would be fun and a good exercise in composition.
     Here's the background I have. It's about 12 inches by 12 inches. It's made of monoprinted cottons and one commercial Stonehenge cotton. I sewed the pieces together onto batting.
Background awaiting its alterations
     The next thing I did was to go through my stash of fabrics and fibers and choose colors and textures that would look good as foreground elements. I chose a couple of sheers in turquoise and teal, some silk sari ribbons in gold and gray. And I put on the the black plastic veggie bag not because I'm going to use it, but because the black looks good and I'll use black thread in the sewing somewhere.
With a cardboard viewfinder

OK. Ready to go with the moods. First one is Abstract. I cut up the fabrics and placed them on, took a photo, then (because the cardboard viewfinder is so old and marked up) I used the ArtStudio App to paint white around the edges to cover up the viewfinder.
Naming this "Riding the Thermals"
Next one is Mysterious. It has a piece of hardware on it. If I were to make this one, I might use an image of the hardware and make it look more like a key.
Naming this "Passages"
Next is Calm
Naming this Contemplation 2
Next is Spiritual. If I were to use this, I'd have text written on the prayer flags. And have a much better image of a person sewn on.
Naming this Praying for Peace
Next is Nature. The tree was added digitally. It is from a sketch of a tree from my yard. If I were to use this, I'd free-motion sew the tree on in black thread.
Naming this "Landing"
     In each one, I tried to create a focal point, tried to create a design that kept the eye moving around, tried to create three masses. In the last one, Landing, I only had two masses. I redid it later by adding a third mass under the bird and it looked better. In Riding the Thermals, I may move the frame over to the right so the bird doesn't get cut off because I think the viewer's eye may jump out of the frame otherwise.
     There are two of these that I'm leaning towards, and they are not the monk or prayer flags. As you know, things always look better once they are actually stitched. I'm not the type of blogger that only shows you finished works. I like to show you things in progress and how they are when they aren't so good, too. Hopefully, this piece will get finished and it will come out looking good in the end. It was a fun, and for me, useful design exercise. 
     I'm linking this to Off The Wall Friday where you can find other art quilt blogs. Please make comments to let the artists know you stopped by. Thanks for visiting.


Friday, June 20, 2014

Line Study Evolving

     Do you feel pressure trying to decide which colors to use in a piece of art? Or which arrangement to use in a composition? I always do. I wonder if there would have been a better choice. Maybe it's because I don't have a formal art training background. Well, for now, I've found a solution that frees me up from worrying about making an irreversible error. I go back and forth between digital and real media.
     In my last post, here, I showed you lines I had sewn onto white crinoline and I was trying to decide what to do next. I showed you this image that I had created with a combination of ArtStudio and Snapseed Apps on my iPad.
digital image from ArtStudio and Snapseed

 Both Apps are so much fun. ArtStudio is very much like Photoshop Elements. In it I used tools to paint over the photos of my crinoline gong interpretation and my crinoline Buddha. Snapseed doesn't take any work or much imagination. It does all the work. You just click on different screens of your photo and it manipulates it all by itself.
     Then I got to work with actual paints on the crinoline that was sewn onto batting.
Paints and GAC 900 on crinoline
I also painted the crinoline sewn Buddha. Then I hand-appliquéd the Buddha and sewed on beads.
In process

 So now I'm again at a stage of not knowing what to do next. I started to square off the piece with a rotary cutter but when I had three edges cut, I paused before I cut off the bottom. I liked the uneven bottom edge. I have to decide whether to paint that bottom edge of fabric, cut it off, add another piece of fabric on top, hang fringy something or other? How to sew on those brown squares. And of course, I need to decide how to edge it. Probably a pillowcase finish. 
     My next step will be to take this last photo back to ArtStudio and paint up the bottom edge various ways to see how it looks. Light, dark, medium values. Teal, brown, mottled, etc.
     I'm linking this to Off The Wall Friday  where you can find other art quilt blogs. Please make comments on their posts to let the artists know you stopped by.


Friday, June 13, 2014

Line Study

     In my latest art group, ArtsEtc, meeting we did an activity exploring how different media can be used on crinoline to express lines. The basic method was to sew the lines onto the white cotton crinoline in black thread and then use various paints afterwards.
NOTE: I prewashed my crinoline to remove any chemicals so that it would take paint well. I drip dried it.
We were supposed to bring some sort of design already drawn out ready to sew. I had no idea what I design I wanted work with and drew out several but didn't like any of them. Then I went through photos I keep in a file that I think I may use for surface design.
     One of the photos is of a gong. It has a nice texture and I do love circles.  So I played with the gong photo in Photoshop Elements and found edges and lines and sketched those out and decided that is what I would sew. I cut out a piece of crinoline and batting and in the meeting I free motion machine stitched this.
gong lines
A good start. But where to go from there. A few days later, I was walking by a Buddha incense burner we have and decided to stitch that too. It might go well with the gong.
incense burner

stitched Buddha on crinoline
To stitch the Buddha:
1.) I made the photo of the incense burner black and white in Photoshop Elements, and increased the contrast.
2.) I inserted it into a WORD document and changed its size until it was a good size to fit nicely onto the stitched gong lines. 
3.)  I printed the WORD document.
4.)  I put tracing paper on top and traced the lines of the Buddha that I wanted to stitch using a mechanical pencil.
5.) I pinned the tracing paper on top of the crinoline and free motioned machined stitched it.
6.) Using tweezers, I carefully pulled off the tracing paper. (I removed the tracing paper before I stitched the "hair" of the Buddha".)
     There remained so many possibilities of how to paint it and how to collage it that I decided to play with the composition with my iPad using ArtStudio and SnapSeed Apps first. 
This is what I ended up with as a digital collage using photos from above.
digital collage
So now I will get out the actual paints, beads, and others and play with my actual stitched pieces. The whole thing is about 7 inches square by the way. I'm linking this to Off The Wall Friday where you can find other art quilt blogs. Please make comments to let the artists know you stopped by.